

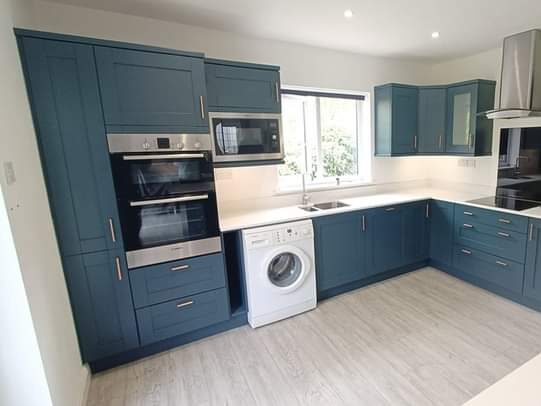

Picture a Tuesday morning in a Swords semi-detached. The cabinet doors have gone the colour of weak tea. A hot pan has left a ring on the worktop. The owner has decided that a full replacement is more than the house needs. This household is invented, but the days that follow show how a Dublin kitchen respray works.
This guide walks through it in order: the quote, the colour choice, the prep, the spraying and the handover.
Keep the Boxes, Change the Surface
A kitchen respray changes the colour and finish of cabinets that are already in place. The doors, drawer fronts, end panels and frames stay where they are. Only the surface changes. That is the key difference from a replacement, where the old units are pulled out and new ones are fitted.
The idea suits a kitchen with sound cabinets and tired looks. If the boxes sag, swell from water damage or work badly for the space, paint will not fix them. A respray is cosmetic. It cannot move a sink or add storage.
Run a quick test. Open every door and press along the frames. Solid, flat panels with intact edges are good candidates. Warped, split or peeling doors need replacing first. Paint follows the shape of whatever is under it. An honest sprayer names the doors that are not worth saving.
Spraying also differs from brush painting. A spray gun lays down thin, even coats, so the surface shows no brush strokes or roller texture. Sprayed cabinets look closer to factory units than a weekend DIY job. The result still depends on prep (see Step Three).
The method reaches beyond cabinets. The Irish company covered below also sprays worktops, including granite, and wardrobes. The quote should list each surface as its own line, so nothing is assumed.
Step One: A Photo, Three Questions and a Written Quote
The first stage is light. The company covered below opens its process with a consultation and takes enquiries by phone, email and WhatsApp. Photos sent by message give any sprayer a head start on the price.
These shots help the sprayer price the job:
- Stand in the doorway and capture the full room.
- Open two or three doors to show the inside edges and hinges.
- Photograph chips, swelling and burn marks up close.
- Include the worktops if they are part of the job.
- Count the doors and drawer fronts and note the total.
Expect three questions: the size of the kitchen, the number of doors and drawers, and the current finish. Those answers set the price band.
The written quote then confirms three things: the work included, the price and the schedule. It also names the surfaces, the colour and the sheen. Anything vague gets cleared up before anyone agrees. A quote that fits on half a page is fine, as long as nothing on it is left to memory.
Location matters before the photos go anywhere. The business serves Dublin, Meath, Kildare, Louth and Wicklow. Its site also names districts such as Swords, Malahide, Clontarf, Blanchardstown and Tallaght. A kitchen outside those areas needs a check before booking.
Reading the Price Bands
The cost of a Dublin kitchen respray follows kitchen size. Size sets the number of doors, drawers and panels to coat. One sprayer, Dublin Kitchen Respray, publishes its size-based bands on its website. Those are the company’s own figures, so use them as a guide and confirm them against a written quote.
| Kitchen size | Published price band |
| Small | €700 to €1,000 |
| Medium | €1,250 to €1,400 |
| Large | €1,400 to €2,000 |
| Very large | €2,000 to €3,000 |
The same company describes the work as around 70 percent cheaper than a new kitchen. That is the firm’s own claim. Replacement prices swing with the units, appliances and fitting, so only a like-for-like quote for the same room shows the true gap.
Shop around, too. When you search for kitchen respray Dublin options, each sprayer describes prep differently. Put these three questions to each sprayer:
- What does the price include?
- Where are the doors sprayed?
- How many days is the kitchen out of use?
Then compare the answers side by side.
Step Two: Picking the Colour and the Sheen
Colour is chosen before any paint is opened, and it is harder than it looks. A shop sample looks different on a full run of cabinets in your own room. Hold the sample against a wall or a spare door in morning light. Then look again in the evening before you decide.
Finish matters as much as colour. The company’s site lists gloss, matt and satin options. Gloss reflects the most light and shows fingerprints and wiping marks. Matt hides small flaws but looks chalky in strong light. Satin sits between the two.
The same site names shades such as sage green, soft off-white, warm cream, light grey, dusty blue, deep navy and charcoal, and it lists 16 colours in all. Ask the sprayer for a real sample. Request a test panel and check how the new colour sits next to your worktop, floor and wall tiles.
Handles deserve a decision at this stage too. New handles change the look as much as new paint does. If the old holes are kept, matching handles fit with no extra filling. If the style changes, the old holes need filling and new ones drilling. Settle this before spraying starts, not after.
Step Three: Prep, the Part Nobody Photographs
Prep takes more effort than spraying, and it decides how long the finish lasts. Kitchen cabinets collect grease, cooking residue and polish, and paint will not bond to any of them. So the surfaces are cleaned first, then primed. The company lists surface preparation as the second stage of its process.
The sprayer then sands lightly so the primer can grip, fills small chips and masks the walls, appliances and floor. The quote should say which of these steps the price includes.
On a good job, doors and drawer fronts come off and are sprayed flat, which gives an even coat on every edge. Fixed frames and end panels are sprayed where they stand, behind masking. Handles and hinges are removed or covered. The sprayer should say where the doors are sprayed and how they are kept clean while they dry.
Material matters too. Solid timber, painted MDF and laminate each take primer differently, so a careful sprayer names the primer that suits your doors. Be wary of anyone who says one system works on everything. A provider who cannot explain the prep in simple words is a warning sign.
Step Four: Spraying, Curing and the Final Check
Spraying is the quick part. Coats go on thin, in steady passes, so no area gets heavy. Between coats the paint needs time to dry, and rushing it causes runs and soft spots. The company says most kitchens are finished in one to three days. The rest of that time is drying, not spraying.
Curing is separate from drying. Paint can feel dry to the touch while the coating is still hardening. Until it has hardened, skip the scrubbing and the strong cleaners. Follow the paint maker’s written care advice for the exact paint used.
Once the paint is dry, the doors go back on. Hinges are refitted and the handles follow. Each door should sit level with its neighbours and close without catching. A door that rubs or hangs low is easier to adjust on handover day than months later.
The company lists a final inspection as the last stage of its process, and a Dublin kitchen respray ends that way, before the kitchen is handed back. Check each door and edge under bright light from several angles, with the owner present. Corners, the areas around handle holes and the insides of doors are where a thin coat shows first.
Take 6 photos of the finished kitchen from the same angles as the quote photos. If a chip or mark appears later, those pictures make a repair conversation quicker and clearer.
Before Day One and After Handover
Before day one, clear these four points:
- Clear the worktops and empty any units the sprayer needs to reach.
- Agree where the doors will be sprayed and how long the kitchen will be out of use.
- Confirm the colour, sheen and handle choices in writing.
- Find out how dust, fumes and household pets are handled during the work.
At handover, finish with these two points:
- Walk the finished kitchen with the sprayer and note any touch-ups.
- Get written care advice before making the final payment.
The company describes the disruption to your home as minimal. Turn that into a specific question: does the kitchen stay usable, and for how many days are the sink and hob out of action?
A Dublin kitchen respray that takes one to three days should end with a walk round the room, pointing at every door, before the last payment.